ViewsAligner
_________________________________________________________________________________________
Purpose of the program
The program ViewsAligner is intended for alignment of 3D photo shots (3D views). The program creates the lenticular interlacing image as an additional feature.
ViewsAligner aligns photo views using bench marks. Bench marks are set in the identical points in all views. Then the program makes the automatical alignment of the views. One bench mark alignment is for the views shifting, two bench marks are for the shifting and rotating, four bench marks are for the shifting, rotating and rescaling. There are the manual alignment tools too.
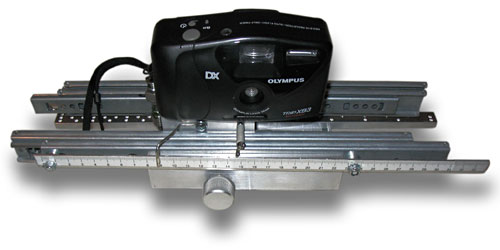
One bench mark alignment is used,
when you use the slide bar without any tilt, and the lens focal length is fixed.(Aperture and exposition are fixed too.)
Two bench marks alignment is used,
when the slide bar or some temporary construction has a different tilt during 3D shooting. The focal length is fixed.
Four bench marks alignment is used,
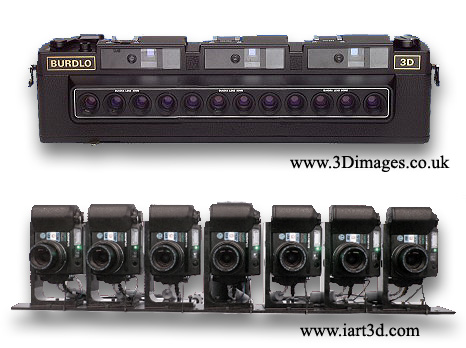
when you use the multi-lens camera or multiple-view image capture system (Multiple-Camera with One Shot). It is impossible to set the absolute equal focal lengths in the all lens, so you need to correct the image magnification. It's impossible to set the lens without any tilts, too.
The images must be in Greyscale, RGB, CMYK colour mode. The program reads files in BMP, PNG, TIFF, JPEG formats, and writes in TIFF. The program doesn't support multilayered TIFF.
Top
Requirements to computer and system
Windows 98/NT4/2000/XP.
Display resolution not less than 800x600 pixels.
512 MB RAM or more
Flash-manual, click Next:
Flash-manual, click Next:
Stereo matching feature is intended for automatical setting of the identical bench marks. Set the bench marks in the left window only, and find the bench marks in other frames automatically. If program can't make the stereo matching correctly (for example, in low contrasted images), set the bench marks manually.
Flash-manual, click Next:
One bench mark alignment is made very easy. Set the bench mark in the point, which is located in the stereo window. This point must be contrasting and visible in all frames. Set this point on the still object , don't set it in a moving tree branch or a water drop. Then you can move the stereo window with Stereo Window Shift button.
Two bench marks are used for the tilts alignment. Attention! Tilts alignment is made relatively to the frame in the left window. Open in the left window the middle frame, because this frame is close to the tripod fastening, so this shoot has no a inclination. It would be better to set the two bench marks in the horizontal line, or close to the horizontal line. First bench mark is located in the stereo window.
Top
Four bench marks alignment
It's very important to set the bench marks correctly. Don't set three points in the same plane (plane is parallel to the stereo window). Set the bench marks so far one from another as possible.
In the beginning set the banch marks in the first and last views. Open in the left window the first view, in the right window - the last view. Set the bench marks and click this button  . You can see the message with angles and rescale parameters. If the angles are very big, unrealistic, it means you choosed not very well bench marks. Click Cancel and choose new bench marks. First bench mark is located in the stereo window.
Look at successful bench marks setting. First bench mark is located in the snow in the foreground. Second point is set in the snow farther. Third point is in the man foot. Fourth bench mark is in the tree in background. Bench marks take along full depth of image. Bench marks are located in the different planes.
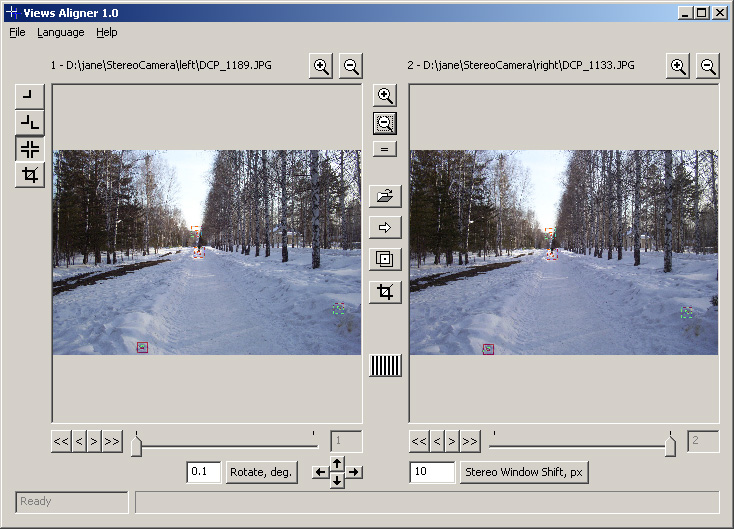
Look at the other image. Two points are located in the same plane. It's possible. But only two bench marks can be situated in tne same plane. Three and four bench marks in the same plane are not permitted. Set the third and fourth points in the other planes.
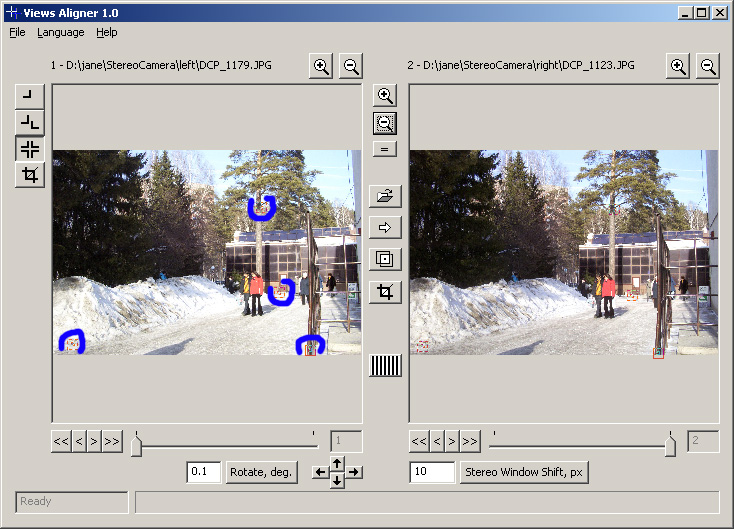
Two points in the foreground horizontal line and two points in the background vertical line, it's very good for shots with distortion.
First bench mark is located in the stereo window.
If bench marks setting is very good, click Cancel again and set this bench marks in the all frames. Don't forget to save the project. Then click the alignment button .
Top
New feature in version 1.1
Flash-manual, click Next:
The application doesn't support Indexed colours images, cannot load multilayered TIFF.
In the find some bugs please contact the developer.
Top
New feature in version 1.3
This version is Windows Vista compatible.
Using the mouse wheel one can increase or decrease the left and right image.
You can move the image using the mouse, when you can see this mouse pointer  .
.
Stereo Window Shift is measured in percents of the frame width.
A new menu item Preview is added.
Anaglyph preview is to see the anaglyphical frames. Frame shift for anaglyph show determines the shift between frames what combine into stereo pairs. Grid and Period of grid is a grid settings.
Run MultiViewer is to run Multi Viewer program.
All copyrights to ViewsAligner are exclusively owned by the author Evgenia Wassenmiller, © 2005-2007.